This guide provides essential information for installing Colorbond wall cladding, ensuring durability and aesthetic appeal. It covers preparation, tools, step-by-step instructions, measurement techniques, and fastening methods. Learn about side-lapping, flashing installation, and rust prevention. Decide between professional installation and DIY, plus get maintenance tips for long-lasting cladding.
Colorbond steel wall cladding offers a modern and durable solution for transforming building exteriors. It provides a beautiful, long-lasting facade, adding depth and texture to any home. Available in a wide range of colors, including matte finishes, Colorbond delivers practical benefits such as low maintenance and lightweight construction. Proper installation is crucial for ensuring its longevity and performance.
Understanding the properties of Colorbond steel is essential before beginning the installation process. Colorbond is known for its corrosion resistance, but careful handling and the use of compatible materials are necessary to prevent issues. This guide provides expert tips and tricks for installers to avoid common pitfalls and achieve professional, long-lasting results.
Whether you are a seasoned professional or a DIY enthusiast, this guide will walk you through the necessary steps to ensure a successful Colorbond wall cladding installation. Focusing on accurate measurements, careful handling, precise cutting, and adherence to manufacturer guidelines will elevate your project to the next level. Consulting with professionals can further enhance the outcome, ensuring every aspect of the installation meets the highest standards.
Preparation Before Installation
Proper preparation is paramount for a successful Colorbond wall cladding installation. Start with a comprehensive site assessment, evaluating weather conditions, building height, and accessibility to determine the best approach. Ensure the wall surface is clean, dry, and free of debris or contaminants that could affect adhesion. Repair any damaged areas and apply an appropriate primer to improve bonding.
Accurate measurements are crucial to minimize waste and ensure a precise fit. Measure twice and cut once to avoid errors. Order the correct amount of Colorbond material to prevent shortages or excess. Select corrosion-resistant materials like Colorbond to avoid rust issues, considering factors such as moisture and industrial pollution.
Plan the installation process, considering factors such as panel placement and alignment. Begin with a starting strip at the base of the wall to ensure the first row of panels is level. Gather all necessary tools and materials before starting the installation. Proper planning and preparation will save time and effort, resulting in a professional and durable Colorbond wall cladding installation.
Essential Tools and Materials
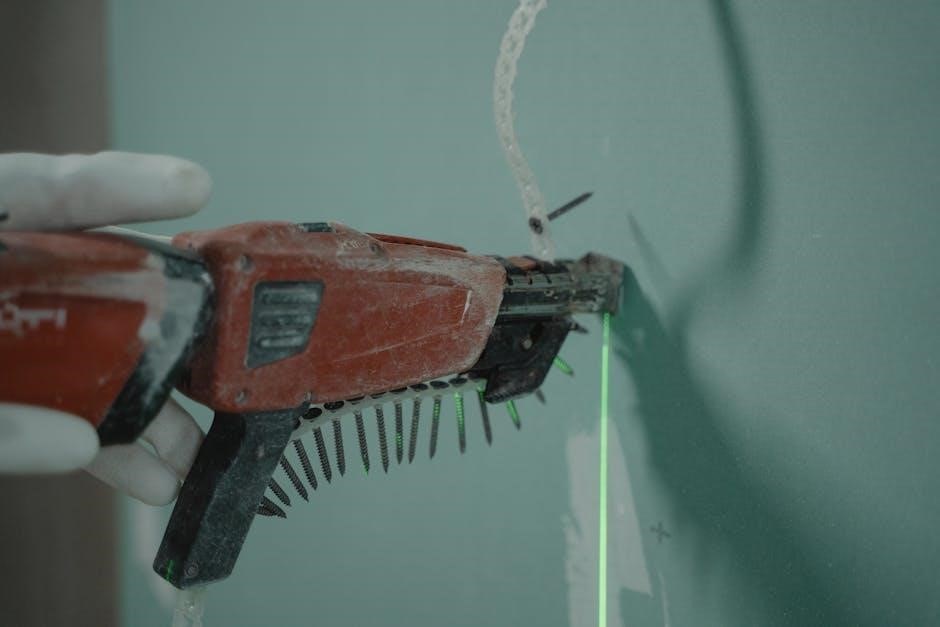
Successful Colorbond wall cladding installation requires specific tools and materials. Essential tools include a measuring tape for accurate measurements, a cutting tool such as metal shears or a nibbler for precise cuts, and a drill or screw gun for fastening panels. A level is necessary to ensure panels are aligned correctly, and safety glasses and gloves protect during the process.
Materials include Colorbond cladding sheets, fasteners like screws or rivets designed for metal cladding, and flashing to seal gaps around openings. A sealant is needed to prevent water ingress, and a primer may be required for substrate preparation. Battens or furring channels provide a fixing point for cladding sheets.
Choosing the right fasteners is crucial for durability. Select those compatible with Colorbond steel to prevent corrosion. Consider the type of cladding profile and the substrate material when selecting fasteners. Using appropriate tools and quality materials ensures a professional and long-lasting Colorbond wall cladding installation.

Step-by-Step Installation Process
Installing Colorbond wall cladding involves several key steps. First, prepare the surface by cleaning it and repairing any damage. Apply a primer to improve adhesion. Next, measure the wall accurately to determine the number of cladding sheets needed, minimizing waste. Cut the Colorbond sheets to the required size using metal shears or a nibbler, ensuring precise cuts.
Begin installation with a starting strip at the base of the wall to ensure the first row is level and aligned. Attach battens or furring channels to the wall to provide a fixing point for the cladding sheets. Position the first cladding sheet and secure it with appropriate fasteners, such as screws or rivets, ensuring a snug fit.
Overlap subsequent sheets according to the manufacturer’s guidelines, maintaining consistent side-lapping. Install flashings around openings, like windows and doors, to prevent water ingress. Finally, seal any gaps with a suitable sealant. Following these steps carefully will result in a professional and durable Colorbond wall cladding installation.
Accurate Measurement Techniques
Achieving a professional Colorbond wall cladding installation relies heavily on accurate measurements. Begin by measuring the height and width of each wall section to be clad. Account for any openings, such as windows and doors, by measuring their dimensions and locations precisely. Create a detailed sketch of the wall, noting all measurements and features.

When measuring for sheet quantities, consider the overlap required for side-lapping, typically around one rib width. Add extra material for potential cuts and waste, aiming for about 5-10% overage. Use a laser level or chalk line to ensure horizontal and vertical lines are straight, providing a reference for accurate measurements.
Double-check all measurements before cutting any Colorbond sheets to minimize errors and material waste. Transfer the measurements accurately onto the Colorbond sheets, using a straight edge and marker. Accurate measurements are crucial for a seamless and aesthetically pleasing Colorbond cladding installation.
Cutting Colorbond Sheets
Cutting Colorbond sheets requires precision and the right tools to avoid damage and ensure a clean finish. Begin by wearing safety glasses and gloves to protect yourself. Place the Colorbond sheet on a flat, stable surface, ensuring it is well-supported to prevent bending or warping during cutting.
For straight cuts, use a nibbler, shears, or a circular saw with a metal-cutting blade specifically designed for Colorbond. Avoid using abrasive blades, as they can generate excessive heat and damage the coating. Follow the marked cutting line carefully, maintaining a steady hand and consistent pressure.
When cutting curves or intricate shapes, use a nibbler or shears for greater control. After cutting, remove any burrs or sharp edges with a file or deburring tool. Clean the cut edges with a cloth and appropriate solvent to remove any metal filings or residue. Proper cutting techniques are essential for a professional and long-lasting Colorbond cladding installation.
Fastening Methods and Considerations
Selecting the appropriate fastening method is crucial for securing Colorbond cladding and ensuring its longevity. Consider the substrate material, cladding profile, and environmental conditions when choosing fasteners. Self-drilling screws are commonly used for attaching Colorbond to steel frames, while rivets or screws with neoprene washers are suitable for timber frames.
Ensure fasteners are corrosion-resistant and compatible with Colorbond to prevent galvanic corrosion. Pre-drilling pilot holes may be necessary to avoid damaging the cladding or substrate. Space fasteners according to manufacturer’s specifications and local building codes, typically at regular intervals along the cladding sheets.
Over-tightening fasteners can deform the cladding and compromise its weather resistance, so use a torque-controlled driver. Concealed fastening systems offer a clean aesthetic and eliminate visible fasteners. Consider thermal expansion and contraction by allowing slight movement in the cladding. Proper fastening techniques are essential for a secure and durable Colorbond cladding installation.
Side-Lapping and Positioning Sheets
Proper side-lapping and sheet positioning are critical for achieving a weather-tight and aesthetically pleasing Colorbond cladding installation. Begin by aligning the first sheet perfectly, using a level to ensure it is plumb; Overlap each subsequent sheet according to the manufacturer’s recommendations, typically one or two corrugations.
Ensure the overlap direction follows the prevailing wind and weather patterns to prevent water ingress. Secure the overlapping sheets with appropriate fasteners, spacing them consistently along the lap. Maintain consistent alignment as you progress, using string lines or laser levels for accuracy. Check for any gaps or misalignments and correct them immediately.
Consider thermal expansion when positioning sheets, leaving small gaps to accommodate movement. Trim excess material at corners and edges for a neat finish. Proper side-lapping and sheet positioning are essential for a weathertight and visually appealing Colorbond cladding installation. Consistent alignment and secure fastening are key to success.
Installing Flashings Around Openings
Installing flashings around openings such as windows and doors is crucial to prevent water penetration and ensure the longevity of your Colorbond wall cladding. Begin by measuring the perimeter of the opening accurately. Cut the flashing material to the required lengths, allowing for overlaps at the corners.
Apply a sealant to the back of the flashing where it will contact the cladding and the opening frame. Position the head flashing first, ensuring it overlaps the top edge of the cladding. Secure it with appropriate fasteners, spacing them evenly along the flashing.
Install the jamb flashings next, overlapping the head flashing at the top corners. Finally, install the sill flashing, ensuring it overlaps the jamb flashings at the bottom corners. All flashings should be installed in a manner to drain water to the outside face of the cladding, preventing moisture buildup. Properly installed flashings protect against water damage.
Addressing Rust Concerns and Corrosion Prevention
While Colorbond cladding is known for its corrosion resistance, addressing potential rust concerns and implementing preventive measures is essential for long-term performance. Excess moisture and industrial pollution can compromise its robust quality. Careless handling of metal cladding should be avoided to prevent scratches or damage to the protective coating.
Choose corrosion-resistant materials like Colorbond, designed to withstand harsh environmental conditions. Ensure proper installation to minimize water pooling or prolonged exposure to moisture. Regularly inspect the cladding for any signs of damage or corrosion, paying close attention to areas around fasteners and edges.
Clean the cladding periodically to remove dirt, debris, and pollutants that can accelerate corrosion. Use mild detergents and soft brushes to avoid scratching the surface. In areas prone to severe weather, consider applying protective coatings or sealants to enhance corrosion resistance.

Professional Installation vs. DIY
Deciding between professional Colorbond wall cladding installation and a do-it-yourself approach requires careful consideration of factors such as experience, tools, and project complexity. DIY installation can save on labor costs, but it demands a high level of skill and attention to detail. Accurate measurements and precise cutting are crucial to minimize waste and ensure a proper fit.

Professional installers bring a wealth of experience, ensuring every aspect of the installation meets industry standards. They possess specialized tools and knowledge to handle complex projects efficiently. Professionals are also familiar with local building codes and regulations, ensuring compliance and avoiding potential issues.
While DIY installation can be rewarding, it may not be suitable for everyone. Assess your skill level and the complexity of the project before making a decision. Professional installation offers peace of mind and ensures long-lasting results, while DIY can be a cost-effective option for experienced individuals.
Maintenance and Care for Colorbond Cladding
Proper maintenance and care are essential to extend the life and maintain the appearance of Colorbond cladding. Regular cleaning helps remove dirt, debris, and pollutants that can accumulate over time. Mild soap and water are generally sufficient for cleaning, but avoid abrasive cleaners or harsh chemicals that can damage the coating.
Inspect the cladding periodically for any signs of damage, such as scratches, dents, or corrosion. Address any issues promptly to prevent further deterioration. Minor scratches can be touched up with Colorbond-specific paint to maintain the cladding’s protective layer.
Ensure proper drainage around the cladding to prevent water from pooling and causing potential damage. Trim vegetation that may come into contact with the cladding, as this can trap moisture and promote corrosion. By following these simple maintenance tips, you can keep your Colorbond cladding looking its best for years to come.

